How to Bleed a Radiator: Easy Step-by-Step DIY Guide 2026
Quick Answer: Bleeding a radiator takes 20 to 30 seconds per radiator and requires only a radiator bleed key and a cloth. Turn off your heating, wait for radiators to cool completely, insert the bleed key into the valve, turn anti-clockwise until you hear hissing, close the valve when water appears, then check and restore boiler pressure. Start with the radiator furthest from the boiler and work towards it, ground floor first.
If your heating is on but your radiators are cold at the top or making gurgling noises, trapped air is the most likely cause. Air builds up naturally inside radiators over time and prevents hot water from circulating properly through the full height of the panel — meaning you pay for heat you are not receiving. Bleeding releases that trapped air, restores full circulation, and brings radiators back to full efficiency without the need to call an engineer. Most homeowners can complete the full procedure in under an hour.
Why Do Radiators Need Bleeding?
When air becomes trapped inside a radiator — sometimes called an airlock — the heated water in the system cannot circulate past it. Because air rises within the radiator while hot water remains lower, the top of the radiator stays cold even while the bottom and the pipes feeding it are warm. In a heavily airlocked radiator, the whole panel may feel cold throughout.
An airlocked radiator forces the heating system to work harder to reach the target room temperature, increasing gas consumption and running costs. Gurgling, banging, and rattling noises from within the radiator are also caused by air moving through the water — all signs that bleeding is needed. Annual bleeding at the start of each heating season is the simplest way to keep the system running at peak efficiency throughout winter.

How to Tell If a Radiator Needs Bleeding
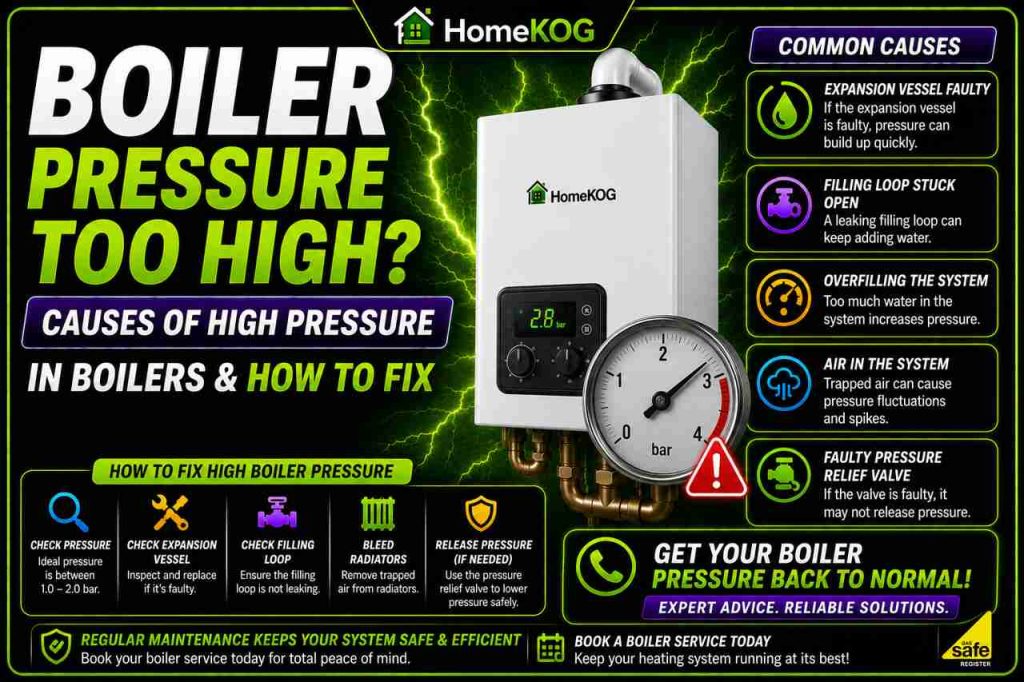
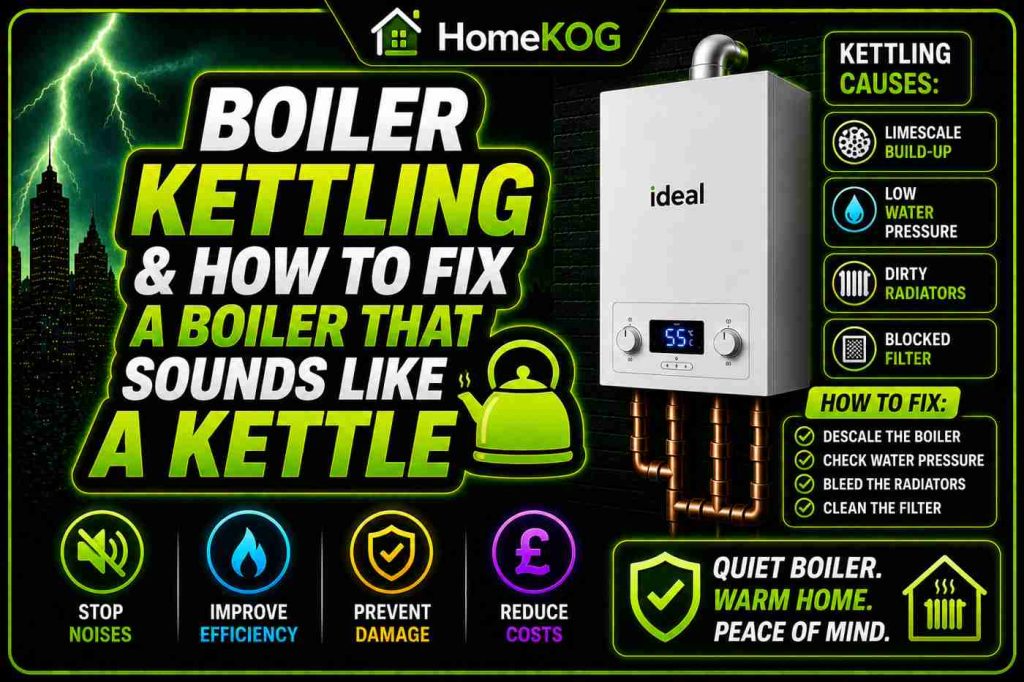
A radiator almost certainly needs bleeding if one or more of the following signs are present. The radiator is warm at the bottom near the pipes but progressively colder towards the top. The radiator feels cold throughout despite the heating being on for a sustained period. The boiler pressure gauge is reading above the normal range of 1.0 to 1.5 bar — excess trapped air in the system can push pressure above this. The radiator produces gurgling, burbling, or rattling sounds while the heating is running.
How Often Should You Bleed Radiators?
Radiators should be checked for trapped air once a year, ideally in early autumn before the heating is needed regularly. Turning the heating on and checking each radiator for cold spots or unusual noises before winter arrives ensures the system is ready for sustained use. Any radiator replaced or removed during the year should also be bled after reinstallation to clear any air introduced during the work.
What You Need to Bleed a Radiator
- Radiator bleed key (standard size fits most radiators made in the last 30 years)
- Clock key (sizes 8 to 12) for older imperial-sized radiators with a different bleed screw head
- Flat-head screwdriver as an alternative to a bleed key for modern radiators with slotted bleed screws
- Cloth or rag to grip the key and catch water drips
- Old towels or dust sheets to protect flooring
A radiator bleed key is always the preferred tool as it reduces the risk of damaging the valve. Never use pliers to grip or turn a bleed valve — the risk of breaking it and requiring a costly replacement is significant. A flat-head screwdriver works adequately on modern standard slotted valves when a key is not available. Allen keys or radiator spanners suit older hexagonal or square bleed knobs.
9 Steps to Bleed a Radiator
Step 1 — Check what type of radiator you have
Confirm the radiator is part of a hot water central heating system before starting. Hot water radiators have two pipes feeding them — one flow and one return. Steam radiators have a single pipe and a bullet-shaped air vent on the side. Steam radiators do not require bleeding and this process will not work on them. If you have steam radiators, cleaning the air vent by removing it and soaking it in warm white vinegar for 30 minutes will often restore correct heat distribution. balancing radiators for energy savings is essential for ensuring that your heating system operates efficiently. By adjusting the flow of water through each radiator, you can achieve a more consistent temperature throughout your space. This step not only enhances comfort but also reduces energy costs significantly.
Step 2 — Turn the heating on and identify which radiators need bleeding
Switch the central heating on and allow all radiators to reach their normal operating temperature. Move through the property checking each radiator for cold spots, particularly at the top, and listening for gurgling or rattling sounds. Wearing light gloves protects against burns on hot panels during this check. Mark every radiator that needs bleeding — a sticky note on the thermostatic valve is a simple way to keep track — before turning the heating off.
Step 3 — Turn the heating off and wait for radiators to cool
Switch the central heating off and allow all radiators to cool completely before proceeding. Bleeding a radiator while the system is still hot risks a burst of scalding water from the bleed valve the moment the air clears. Wait until every radiator is completely cold to the touch before beginning.
Step 4 — Lay down towels to protect flooring
Place old towels or dust sheets on the floor beneath each radiator that needs bleeding. Some water spillage is unavoidable — the valve must remain open until water begins to flow to confirm all air has cleared, and a small amount will drip or run from the valve. In older systems where the water has reacted with rust inside the pipework, the water that escapes may be discoloured, making floor protection particularly important on carpets and pale flooring.
Step 5 — Insert the bleed key into the valve
The bleed valve is located at the top of the radiator, typically at one end. It has a square slit in the centre into which the bleed key fits. Insert the key and feel it click into place in the groove. Have the cloth or rag in the other hand ready to catch drips before opening the valve.
Step 6 — Open the valve and bleed the radiator
Turn the bleed key anti-clockwise by no more than half a turn. A hissing sound confirms air is escaping from the top of the radiator. Hold the cloth close to the valve to catch any water that follows. As soon as the hissing stops and a steady drip or small stream of water appears, close the valve immediately by turning the key clockwise. Do not leave the valve open beyond this point — water will continue to flow and unnecessary pressure loss from the system will result. On modern radiators the water can emerge quickly once the air clears, so be ready to close the valve promptly.
Step 7 — Repeat on all radiators that need bleeding
Work through every radiator that was identified in Step 2, starting with the radiator furthest from the boiler. In a two-storey home, begin with the most distant radiator on the ground floor and work towards the boiler, completing all ground floor radiators before moving upstairs and repeating the same furthest-to-nearest sequence. This order ensures any remaining air in the system is progressively displaced towards the boiler as each radiator is cleared. Once the heating system is fully operational, homeowners may want to explore various boiler finance options for homeowners to ensure they can afford any necessary upgrades or replacements. Understanding these options can help manage costs effectively while investing in a reliable heating solution. Many providers offer flexible payment plans tailored to individual needs, making it easier to keep homes warm and comfortable throughout the winter months.
Step 8 — Check the boiler pressure
Bleeding radiators releases water from the system, which causes the boiler pressure to drop. Check the pressure gauge on the front of the boiler immediately after completing all radiators. A hydraulic gauge with a dial should read between 1.0 and 1.5 bar — if the indicator needle has dropped below 1.0, the system needs repressurising before the heating is turned back on. A digital gauge will typically flash or display a warning if pressure is outside the acceptable range.
Step 9 — Repressurise the boiler if needed and turn heating back on
If the pressure has dropped below 1.0 bar, restore it using the filling loop before restarting the heating. Most modern boilers have either an external filling hose or an internal filling key — the boiler manual confirms which type is fitted and the correct procedure for the specific model.
For an external filling hose, ensure the boiler is off, attach both ends of the hose to the boiler valves, open both valves to allow mains water into the heating circuit, watch the pressure gauge rise to 1.5 bar, then close both valves and disconnect the hose. For an internal filling key, ensure the boiler is off, insert the key and open the filling position, allow water to enter until the gauge reads 1.5 bar, then return the key to the closed position and remove it.
Once pressure is restored to between 1.0 and 1.5 bar, turn the heating back on and check that all the previously cold radiators are now warming evenly from bottom to top. If cold spots persist after bleeding, a Gas Safe engineer should investigate — persistent cold spots can indicate sludge accumulation rather than trapped air, or a system leak that is causing ongoing pressure loss.
What to Do If Bleeding Doesn’t Fix the Problem
Trapped air is the most common cause of cold radiators but is not the only one. If radiators remain cold or develop cold spots shortly after bleeding, two other causes are worth investigating. Magnetite sludge — the black iron oxide that accumulates in aging heating systems — can settle at the bottom of radiators and prevent hot water from circulating through the lower section, producing a cold bottom rather than a cold top. A power flush carried out by a Gas Safe engineer clears sludge from the full heating circuit. A system leak causing ongoing pressure loss will also cause recurring cold spots as the system repeatedly loses the water pressure needed for effective circulation.
FAQ
How long does it take to bleed a radiator?
A single radiator takes 20 to 30 seconds to bleed in most cases. Larger radiators with significant trapped air may take slightly longer. The full process for a home with multiple radiators — including checking each one, completing the bleed sequence in the correct order, and checking boiler pressure afterwards — typically takes 30 to 60 minutes in total.
Should the heating be on or off when bleeding radiators?
The heating must be switched off and all radiators must be completely cold before bleeding begins. Bleeding with hot water in the system risks scalding burns from the valve when the trapped air clears. Always wait for every radiator to be completely cold to the touch before inserting the bleed key.
Which radiator do I bleed first?
Always start with the radiator furthest from the boiler. In a two-storey home, begin with the most distant radiator on the ground floor and work towards the boiler across the ground floor before moving upstairs, finishing with the radiator closest to the boiler. This sequence progressively pushes remaining air towards the boiler as each radiator is cleared.
How do I know when a radiator has been successfully bled?
The bleed is complete when the hissing sound of escaping air stops and a steady drip of water appears from the valve. Close the valve immediately at this point. After all radiators have been bled and boiler pressure has been restored, turn the heating on — successfully bled radiators will warm evenly from bottom to top within a few minutes.
Why does my boiler pressure drop when I bleed the radiators?
Bleeding releases a small volume of water from the heating circuit alongside the trapped air. The loss of this water reduces the pressure in the closed heating system. This is normal and expected — checking and restoring the boiler pressure to between 1.0 and 1.5 bar using the filling loop after bleeding is a standard part of the procedure.
Can I bleed radiators with automatic bleed valves?
Yes. Automatic radiator vents — also called auto vents — are devices fitted to radiator valves that release trapped air gradually without any manual intervention. If your radiators are fitted with these, you will not need to bleed them manually. However, automatic vents can become blocked or fail over time, in which case the valve should be cleaned or replaced rather than attempting to manually bleed a radiator fitted with one.
How do I know if my radiator needs bleeding or has a different problem?
A radiator that is cold at the top but warm at the bottom almost certainly has trapped air and needs bleeding. A radiator that is cold at the bottom but warm at the top is more likely to have sludge accumulation at the base that requires a power flush rather than a bleed. A radiator that is cold throughout with correct boiler pressure may have a closed or faulty thermostatic radiator valve that needs inspection by a plumber or Gas Safe engineer.
Conclusion
Bleeding radiators is one of the most effective and accessible maintenance tasks a homeowner can carry out on their central heating system. The full nine-step process requires no specialist knowledge, costs nothing beyond a radiator bleed key, and takes under an hour for a complete home. Carrying out the procedure at the start of each heating season — before the first sustained cold spell — ensures maximum efficiency throughout winter and prevents the gradual creep of higher gas bills that comes from running an airlocked heating system at reduced capacity. To further enhance the efficiency of your heating system, it can be beneficial to invest in the best energyefficient radiators available. These modern radiators are designed to provide optimal warmth while minimizing energy consumption, thus lowering your overall heating costs. Coupled with regular maintenance like bleeding, you can ensure your home remains cozy without overspending on energy bills.
If bleeding does not resolve cold spots, or if radiators require bleeding more than once in a single heating season, a Gas Safe engineer should investigate the system for sludge accumulation or a slow pressure leak — both of which require professional attention to resolve fully.